

Embroidery is a craft to decorate the fabrics . It enhances the beauty of the dresses. It can be done with needle , thread and some embellishments .
Basic things needed :
- Needle
- Embroidery threads
- Fabric
- Embroidery Ring
Before getting started Fix the fabric in the Embroidery Ring and tighten it . Place the inner ring below the fabric . Put the fabric on it and then the outer ring above the fabric and press it. Now tighten the screw. Take embroidery thread with desired length and separate 2 strands. We can increase or decrease the number of strands according to the design.
There are few basic stitches to be learned for doing simple embroidery projects.
Running Stitch.
This is very basic stitch which can used for outlines of the designs.
Pull the needle above the fabric and push it down a little ahead and again pull it upwards a little ahead.By doing this continously we can get running stitch as shown below.

The distance of the stitch and the space should be equal so that it looks neat.
Double running stitch :
This is same as running stitch instead we stitch every stitch 2 times to make it look thick. It can be used for outlines in the deigns.

Instead of inserting needle a little ahead after first stitch we have to insert in the same start place and pull it down again to make the stitch twice. Do it continously to get double stitch. 
Split Stitch:
This stitch is adds some look to running stitch . After doing first stitch we have to pull the needle above from the middle of the first stich by splitting its strands . 

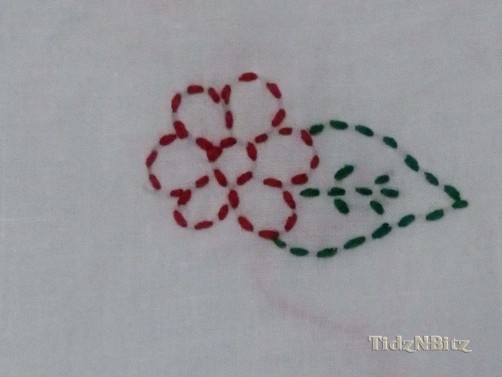
Here is a design using double running stitch
Few more stitches will come soon 🙂
